
July 2023
Greetings and Welcome to the July edition of Woodcore Changelogs! We are thrilled to take you on an exciting journey through the latest features, updates, and fixes that have been added to our system. The past month has been filled with remarkable progress, which we cannot wait to share with you in this edition.
Let's dive right into the new features and improvements that have been made to the Woodcore ecosystem.
New Features 🎉
User Module: Experience more secure user access with the new user creation implementation.
In the past month, notable additions have been made to improve our user creation process on the console. These updates introduces a new flow for creating users on the system, and they include the following features:
- Linking a user to an employee
On Woodcore, a user is an employee within an organization who has access to the Woodcore API or console. In that view, a user must first exist as an employee on the system. Once the employee is created, user access to the API and console can be created for this employee by linking the user to the existing employee during user account creation. This ensures that the necessary user information already exists on the system before user access can be successfully created.
- Password setup
To ensure a more secure experience for our users, after creating user access, an email will be sent to the new user containing essential account details, such as their username, account ID, and a secure link to set up their user password. It is important to note that, user passwords can ONLY be set using the provided link.
To access this update:
- On the console, navigate to Users > Users & API Management
- Click on the "New user" button at the top right of your screen.

Create New User
- On the user creation form, select the appropriate office and employee fields.
fields.
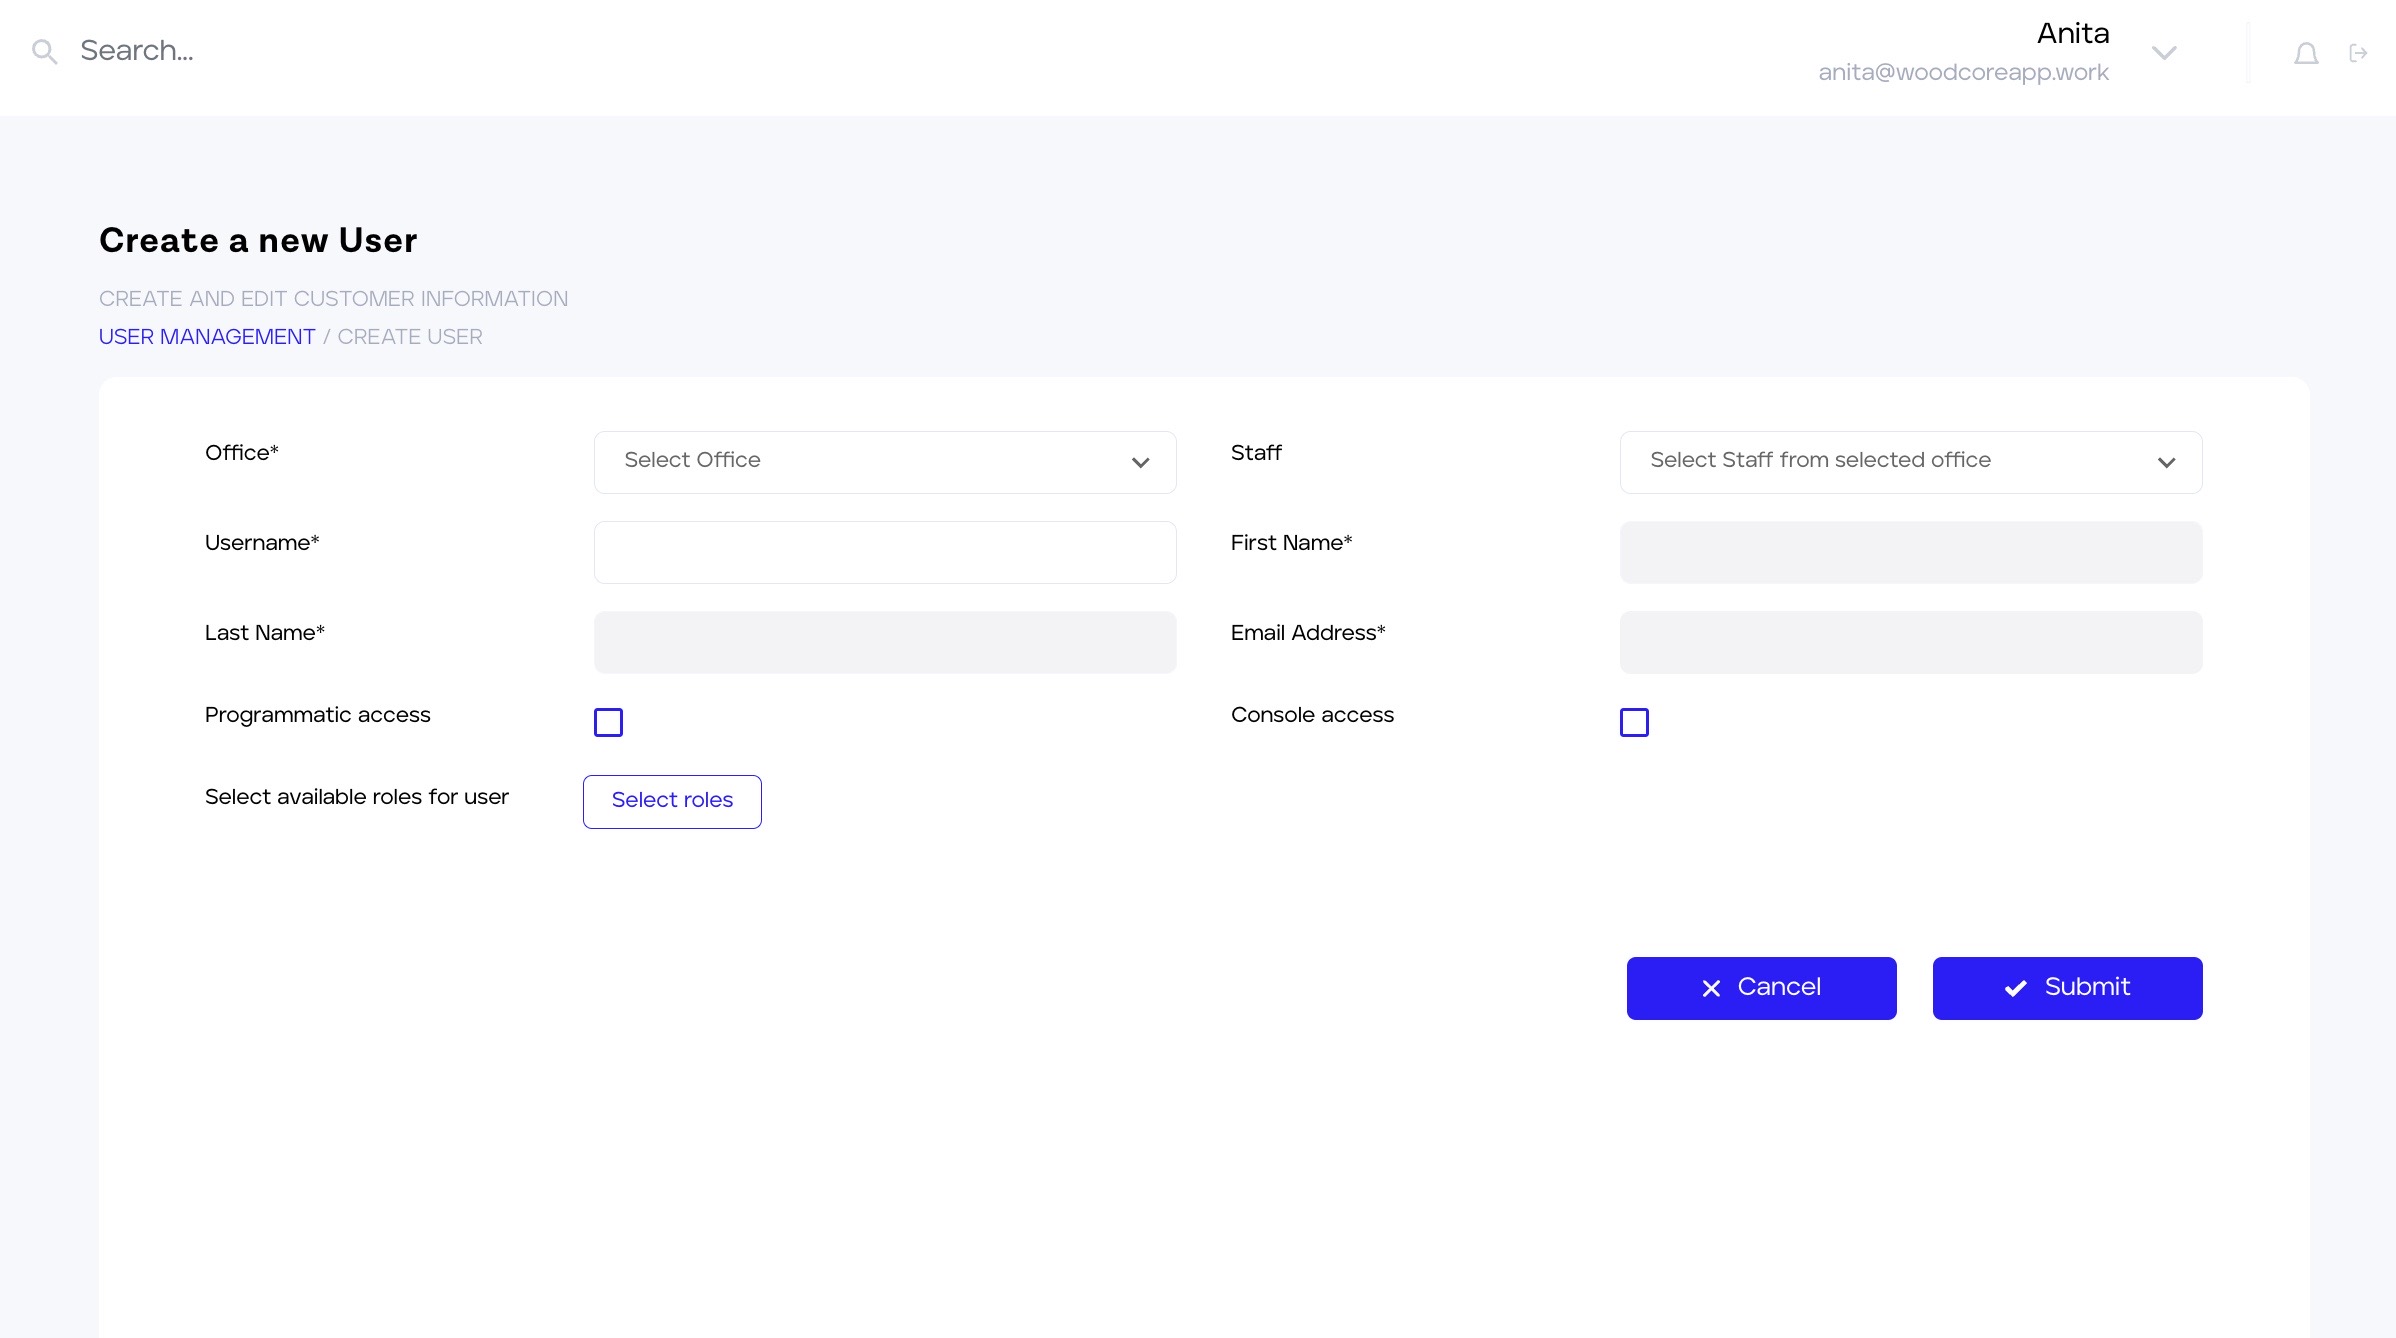
User Creation Form
- Once the office and employee field is fields are selected, the following information will be automatically filled in from the existing employee information:
- First name
- Last name
The user will have the option to enter a username for the newly created user.
We believe that these enhancements will significantly improve the user creation process, and increase security by ensuring that passwords are managed by the users.
See the User documentation for more information.
Report Module: Addition of new reports to the system
In the month of June, new reports were added to the report module to enlarge the spectrum of valuable information you receive using the report data and provide you with a more comprehensive insight into your organization’s data and activities. The new reports include:
- Billing report
We are glad to announce the addition of a new report to the organization reports section, known as the Billing Report. The billing report contains an overview of the charges an organization incurs for each account created within an account type. The generated data contained in the reports include:
- Account Types: This lists the different types of accounts, including, loan, savings, and fixed deposit accounts, created on a specific tenant.
- Account Rate: For each account created within the tenant, the report displays the corresponding charge rate.
- Total Account Count: This includes the total number of accounts under each account type.
- Bill Calculation: The report calculates the total bill by multiplying the number of accounts for each type (e.g., savings accounts) by the respective rate per account.
For example, where 250 savings accounts were created within a tenant, and the rate per account is N30. The bill calculation can be derived by simply multiplying the number of savings accounts (250) by the rate per account (N30), resulting in a total of N7500.
Note: Only accounts that were active for a minimum of one day during the duration of the report will be included in the report. In other words, accounts that had no activity within the billing period will not be considered in the report.
To generate a billing report:
- On the report module, navigate to the “Organization report” section and select “Billing report” from the report list.
- Select an office, date, and generated type.
- Report: Single Customer Report (Nigerian market)
The Single Customer View (SCV) report contains a list of all customers within an organization including details such as their savings account, associated product, and linked loan account where available. The SCV report is designed to provide you with greater insight into your customers and access to your customer’s data.
This report is divided into five sections which contain the following generated information:
- The index and NDIC instructions.
- The organization's details such as the type of bank, the name of the bank, address, etc.
- Customer's information along with savings and loan accounts
- Individual and corporate accounts of customers.
Note that the SCV is only available for our Nigerian clients based on the request of these clients.
Improvement 🚀
User Profile: User Password Reset using password reset email link
Another exciting update has been made to the user module, which introduces a convenient and secure password reset feature. With this update, users with the Superuser role can request for password reset on behalf of another user. Once this request is made, a password reset email will be sent to the intended user's email, enabling which allows them to easily reset their password.
This feature is only available for users with a superuser role.
Here's how the new password reset process works:
- When a user with the superuser role makes a request to reset a user's password.
- An email will be automatically sent to the email address provided by the user during the user creation process.
- In the email, a password reset link will be provided, giving the user a direct and secure way to set their new password.
- Once the user clicks on the password reset link, they will be redirected to a page where they can easily create a new password.
- With the new password set, the user can log into the system without any hassle.
Maker checker: Checkers are now able to view accounting actions.
Significant updates have also been made to the maker checker feature on our system. The maker checker is a vital component that ensures proper authorization of actions are carried out within an organization. This feature involves two individuals for each transaction: the maker, who initiates the action, and the checker, who approves or rejects it.
On Woodcore, organizations have the flexibility to choose which actions require checker authorization. In this view, we have made an update that enables the checker to view requests for account entries, such as GL-to-GL entries and account-to-GL transactions.
When a maker initiates a journal entry or an account entry on the system, important details of the accounting transaction such as the maker name, office, entry details, accounts, and other essential information related to the action are displayed. Using this information, the checker can either approve or reject the request.
With this update, we aim to enhance accountability, accuracy, and control over financial transactions.
Here is a sample of journal entry details available for checker action.
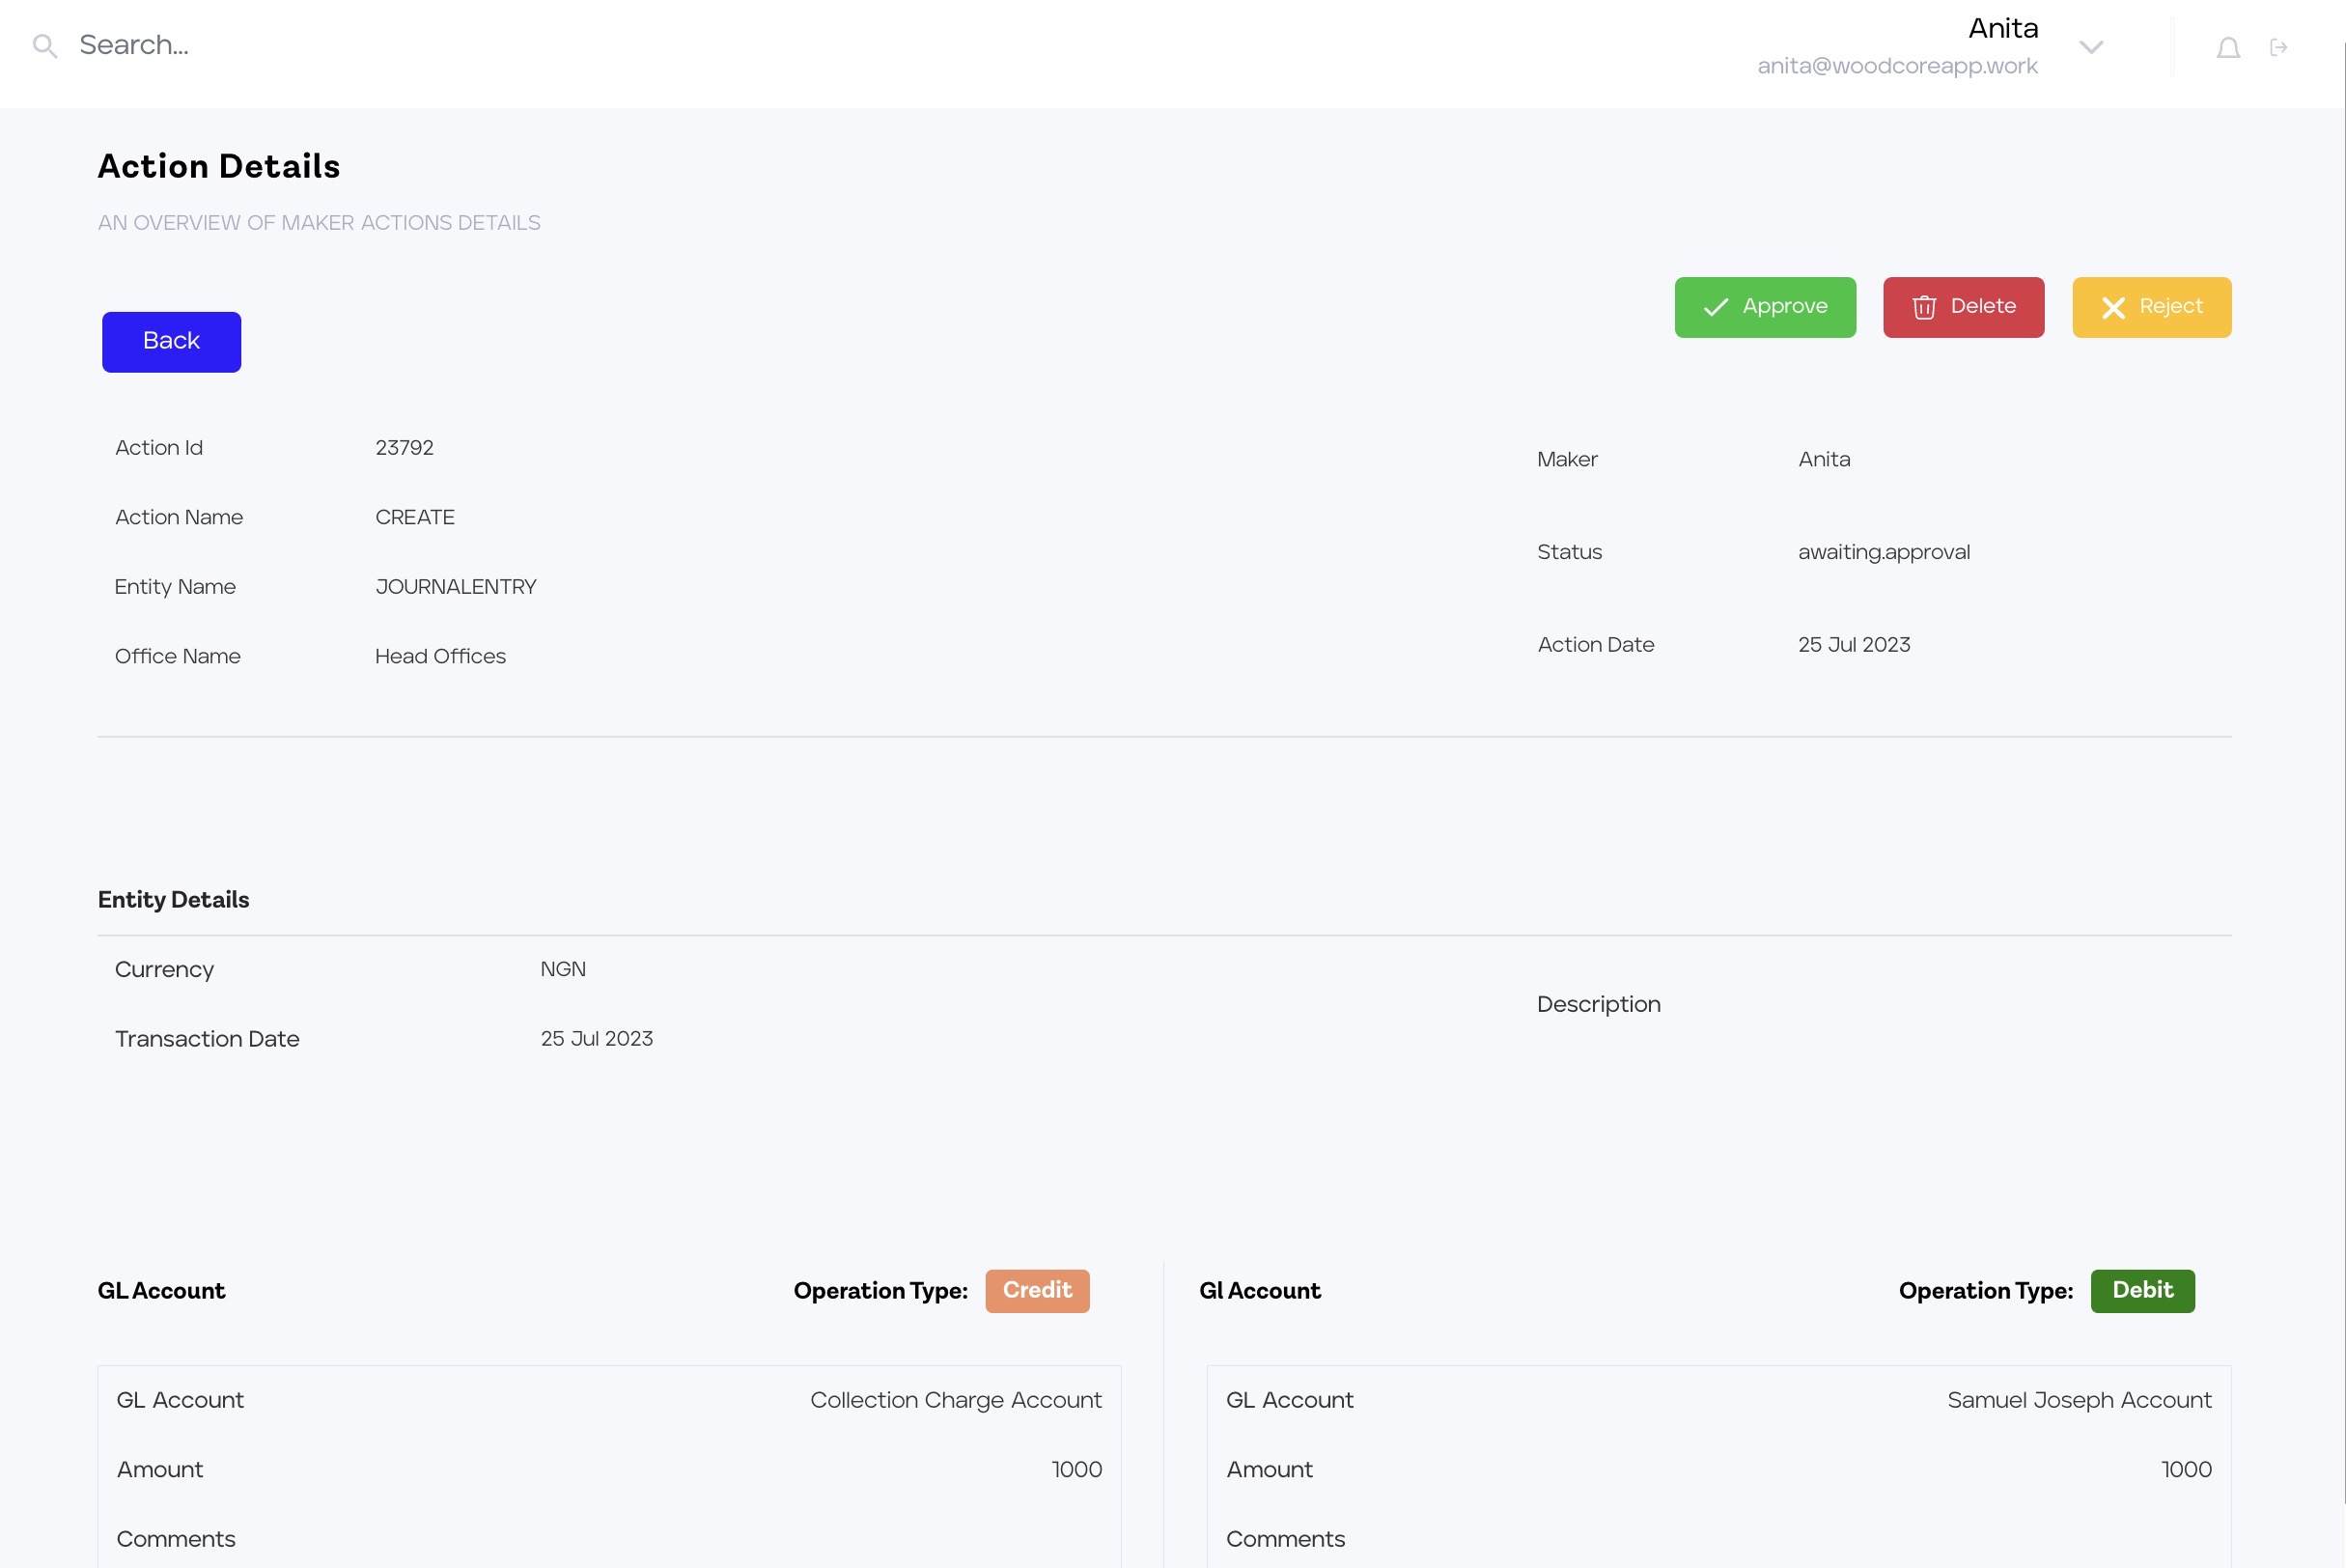
Checker task for journal entry
Bug fixes ⛏
Fixed Deposit Account Module: Resolved incorrect interest calculation bug on maturity instruction
Previously, we experienced an issue with the premature Fixed Deposit (FD) account closure process, where the displayed maturity amount on the modal showed an incorrect interest calculation. However, this issue has been successfully resolved, and now the interest calculation on the maturity amount field accurately reflects the correct amount.
As a result of the fix, the amount presented on the premature closure modal now represents the maturity amount correctly. Users can be confident that the displayed figures align with the actual maturity amount.
API Update ⚙️
Loan Module: Addition of new endpoint to the Loan Module
A loan application that does not meet any of your organization's intended loan requirements can be rejected using the reject loan endpoint. This addition is aimed at improving the experience of our users and providing them with all the necessary features they require to maximize their loan offerings. To reject a loan, you are required to include the loanAccountId in the URL path. Additionally, in the request body, you are to provide the date of the rejection and a brief description note explaining the reason for the rejection.
We hope you find this documentation informative, and as always, we welcome your feedback. If you have any questions or need further assistance, please feel free to reach out to our support team.